Quick Start
1. Install Sofewave HIG GloveNG
- Join Our 👇
Loading...
Online: ...
- Download the latest version of the HIG GloveNG installer in the
#software-updatechannel under theHIG GLOVE🧤category. - Double-click the downloaded installer and select the all English character path as the installation path to make sure install successful.
- When you reach the last step, please check
Create Desktop Shortcutto create a desktop shortcut.
Waring
- In addition to requiring the installation path to be a pure English character path, you must also ensure that your Windows username consists solely of English characters for HIG GloveNG to function properly.
- The simplest way to check is:
- Right-click a file in your download directory and select Properties.
- In the pop-up window, check the Location field:
C:\Users\[Username]\Downloads
- If the username contains non-English characters, please search for solutions independently, as this document does not provide further explanation.
2. Plug In The Receiver
- Remove the receiver from its packaging and insert it into a USB port on your computer. Ensure there are no large metal surfaces or other objects nearby that may interfere with the receiver's signal.
Details
It's recommended to:
- Connect the receiver to a USB 2.0 port,
- OR use a USB 2.0 extension cable to distance it from USB 3.0 ports.
This reduces potential 2.4 GHz signal interference.
3. Pairing HIG Glove
- Double-click on the desktop HIG GloveNG shortcut to open the software. the
Hand Iconshould be light up. - Press and Hold the Power Button until the LED lights up. if the color is cyan, then the HIG Glove is not paired with the receiver.
- Press and Hold the Menu Button to enter Pairing Mode. When in Pairing Mode, the Power Button LED will be purple in color and the pairing will be completed automatically afer a few moments.
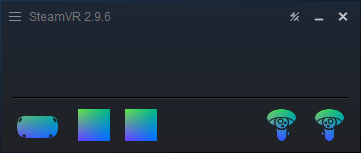
4. Start SteamVR
- Put on your VR headset and launch SteamVR.
- If everthing is working properly...
- The
Steam Iconon HIG GloveNG's Main Interface will light up - The
Hand Iconon HIG GloveNG's Main Interface will light up - Two blue cube icons will appear in the SteamVR window
- The
5. Set Glove Controller Pose
- Bind to current controllers:Select this option if you are using the handle as a glove position source.
- Use selected devices:Select this option if auto-binding fails or if Tracker is used as the glove position source.
Tip
VR Headset Controllers usually have similar characters such as Controller_LEFT and Controller_Right to distinguish left from right.
If use Tracker, please determine the corresponding Tracker ID before binding.
6. Complete Setup And Start Tracking
- If the SteamVR main window shows two new box icons, you have completed the main step.
- Click the Play Button at the bottom right corner of the HIG GloveNG main window to turn on the HIG Glove's tracking.
7. Check The Glove In SteamVR
- Put on your VR Headset and open a VR game that supports Finger Tracking (Such as: VRChat / SteamVR Home).
- Check if the hands are bound correctly, if there is any problem such as the virtual Index Knuckle not moving at the world orgin, wrong hands binding, etc. If the problem exists, please configure the HIG GloveNG again according to
6. Set Glove Controller Posesection. - Check if there is any deviation between the in-game hand transforms and real HIG Glove transforms. If the deviation is too large and unacceptable, check if you have selected the Tuning preset or manually adjust the Tuning yourself unitil you are satisfied.