Instruction for HIG Glove
Thank you for choosing and purchasing our HIG Glove product. Below is an instructional document for this product that we hope will help you.
You can also join our to find Help. 👇
Basic Preparation
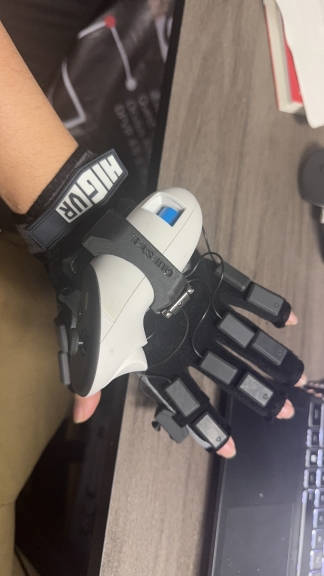
About HIG Glove
Parts Name and Usage
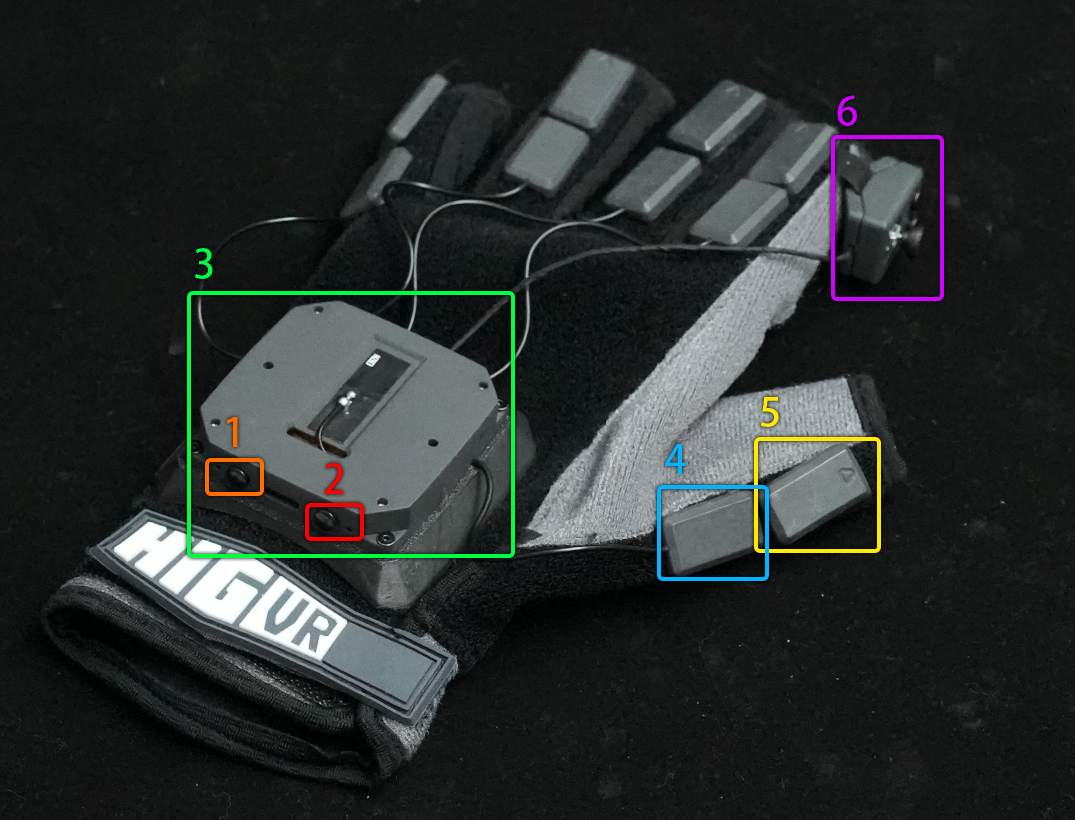
| Number | Name | Usage |
|---|---|---|
| 1 | Power Button & LED | Press and Hold: Power ON / Power OFF |
| 2 | Menu Button & LED | Press: Open / Close SteamVR Menu. Press and Hold: Pairs with receiver. Power Button LED turns Purple. |
| 3 | Data Box | — |
| 4 | Hall Effect Module (Distal Joint) | — |
| 5 | Magnet Module (Middle Joint) | — |
| 6 | Controller Module (Optional) | — |
LED Status Light
| Power Button LED | Meaning | Menu Button LED | Meaning |
|---|---|---|---|
| Cyan | Receiver Not Connected | Blue | Charging Complete |
| Purple | Pairing With Receiver | Flashing Blue | Now Charging |
| Green | Battery: 100% - 40% | — | — |
| Orange | Battery: 40% - 20% | — | — |
| Red | Battery: 20% - 5% | — | — |
| Flashing Red | About to Shut Down | — | — |
About HIG GloveNG
Main Interface
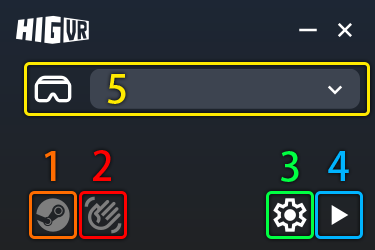
| Number | Name | Usage |
|---|---|---|
| 1 | Steam Icon | If light up: Means the HIG GloveNG has established communication with SteamVR. |
| 2 | Hand Icon | If light up: Means the HIG GloveNG has detected the Receiver. |
| 3 | Setting Button | Click to open HIG GloveNG Configuraions Window. |
| 4 | Play Button | Click to start glove tracking, click again to stop tracking. |
| 5 | Preset Change | Click to expand the HIG Glove's official Tuning presets, and select one to apply it. |
Configuraions Window
Controller Pose
- Bind to current controllers:Select this option if you are using the handle as a glove position source.
- Use selected devices:Select this option if auto-binding fails or if Tracker is used as the glove position source.
Tuning
- The Tuning function can be used if you wish to adjust the hand tuning data more finely for different usage scenarios or if your device's tuning presets are not included in HIG GloveNG for the time being.
- The position of the glove is determined by six parameters. Taking Left hand as an example: the first line of parameters is used to adjust the Translation, the second line of parameters is used to adjust the Rotation.
- You can click on the value and then enter the number directly for fine adjustment, or you can use the Up & Down Keys to quickly adjust to a rough Transform.
Info
Lighthouse Mode is a historical artifact that was used to switch whether or not to recalculate the coordinate system, and will be removed in future releases.
Calibrating
- Calibrate Gestures: Follow This Link
- Calibrate Joysticks: Follow This Link
VMC
- Check
Enable VMC outputto send VMC data to theTarget port.
Curve Editor
- Used to further adjust the HIG Glove effect to meet individual customization needs.
Debugging
- You can view and debug HIG Glove data here to assist in troubleshooting problem areas.
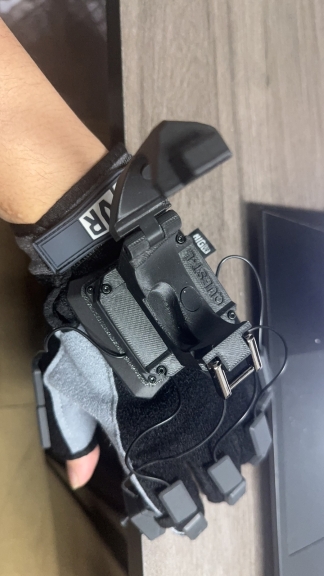
Set HIG Glove Hardware
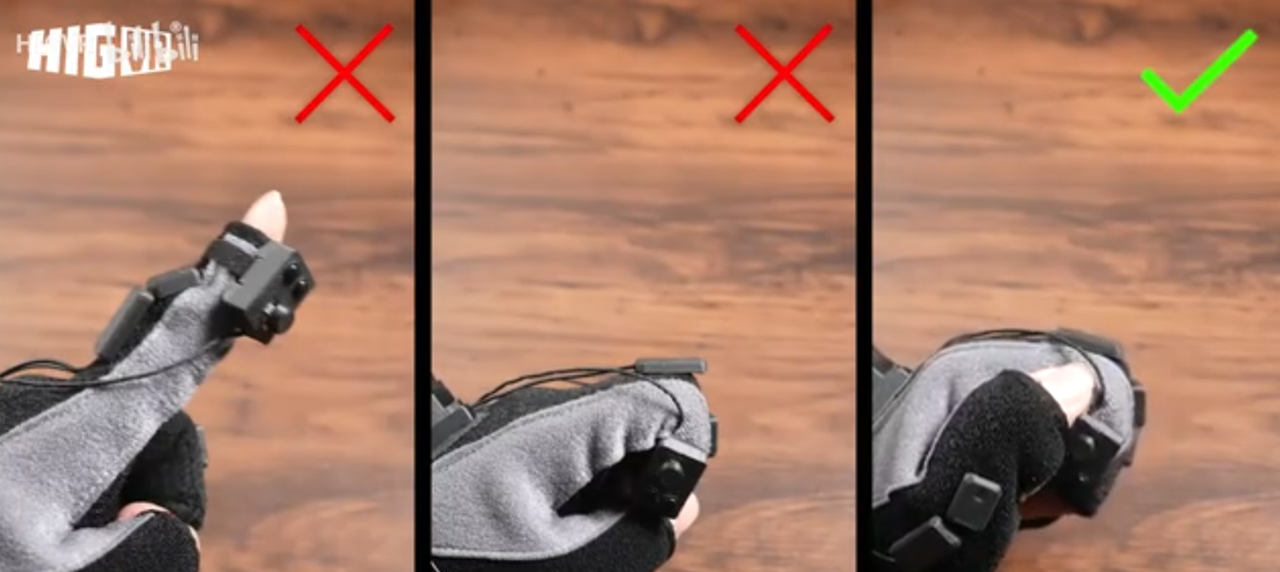
Adjust Sensor Modules
Placement of Sensors (Hall Effect Module & Magnet Module) Shall comply with:
- Kinematic Clearance:
- Modules must maintain flush contact when fist is clenched (no lift-off)
- Modules shall avoid mutual collision when fingers are fully extended
- Proximity Optimization:
- Subject to Rule #1, minimize clearance between Hall Effect and Magnet modules
- Maximize proximity while preventing mechanical interference
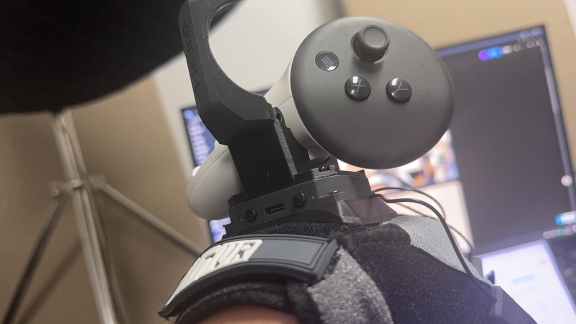
Mount Controller/Tracker
Installation of Controller Holder
- Orient with arrow mark facing Type-C port, metal latch toward fingers
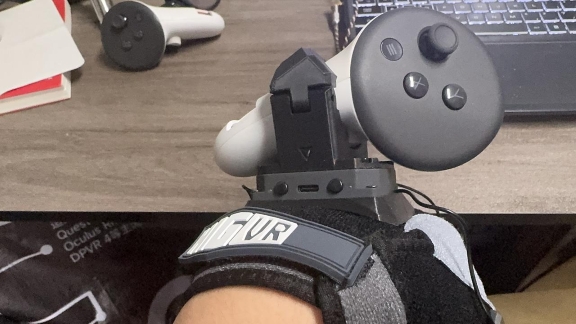
- Engage controller's side grip button into the clamp's bottom groove
Installation of Tracker Holder
| ! WARNING ! For demo purposes only! | Do Not Remove quick-release base from Glove! |
|---|---|
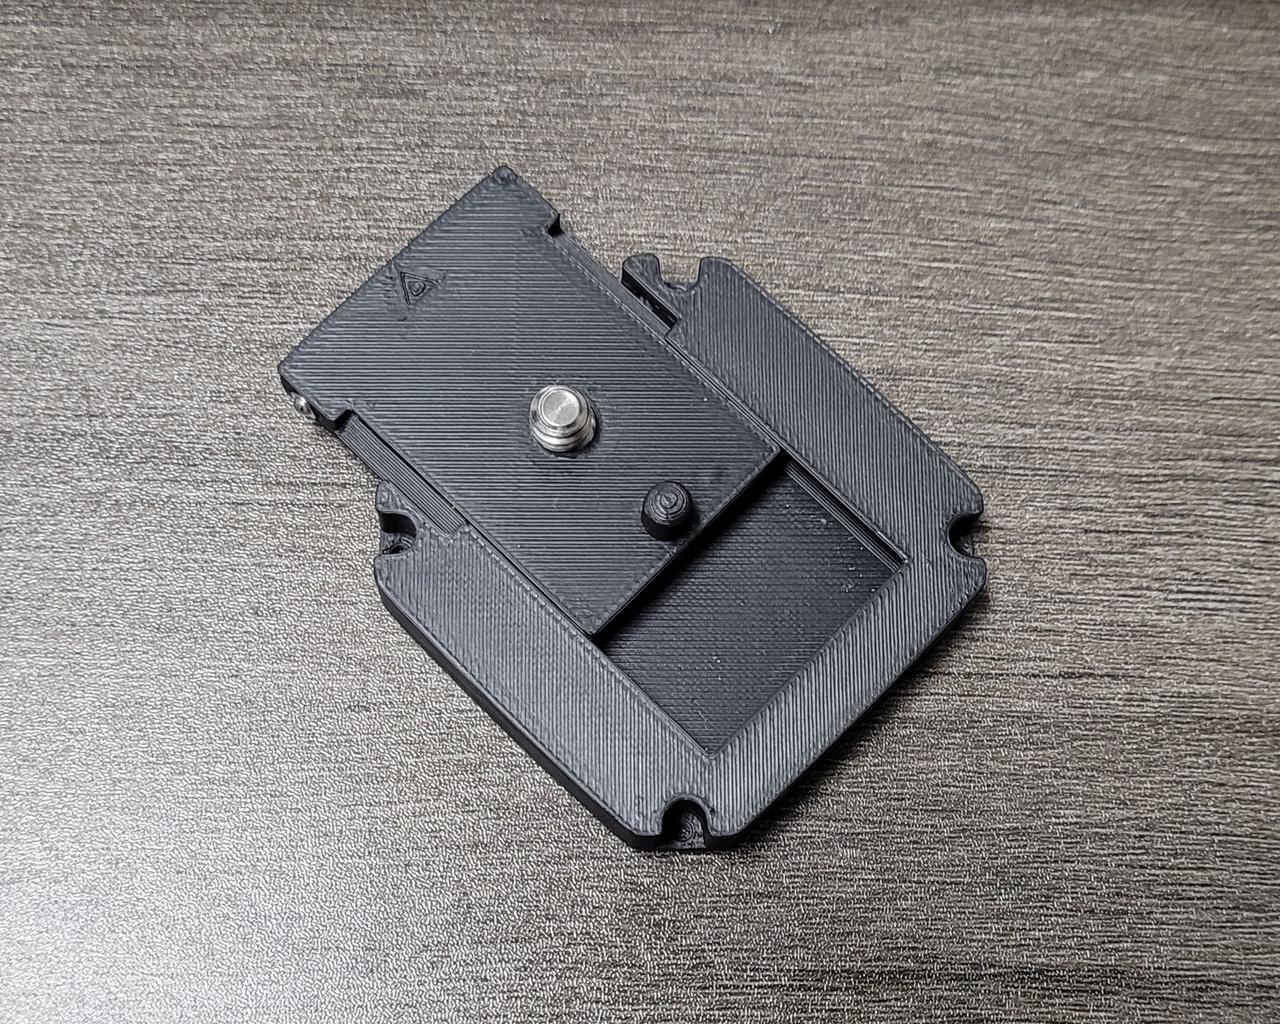 1. Slide quick-release module outward along arrow direction 1. Slide quick-release module outward along arrow direction | 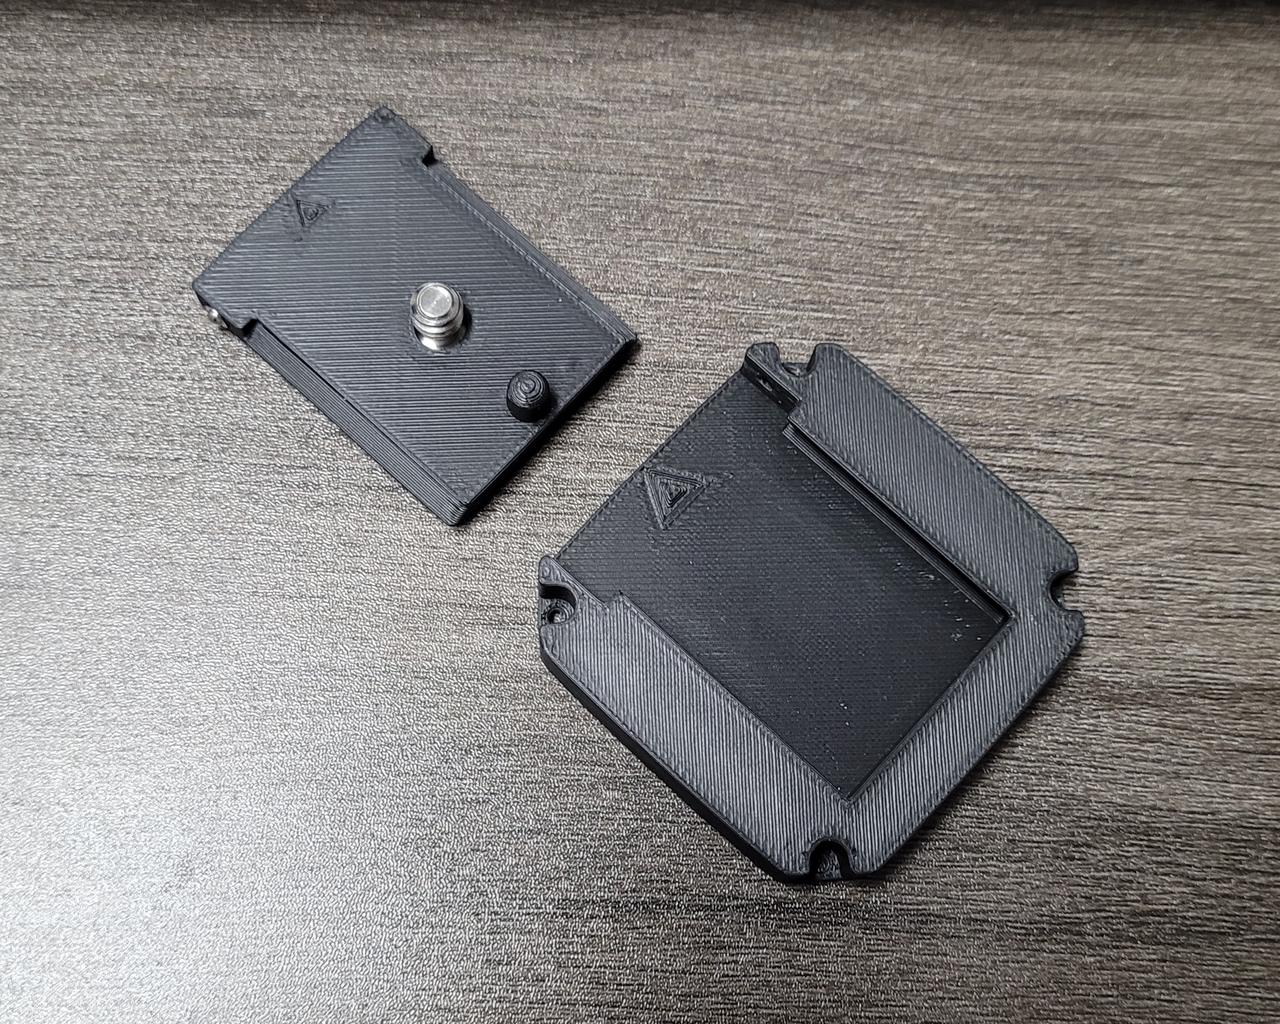 2. Detach module completely from base 2. Detach module completely from base |
 3. Remove mounting screw, observe screw hole alignment and fool-proof pin orientation 3. Remove mounting screw, observe screw hole alignment and fool-proof pin orientation | 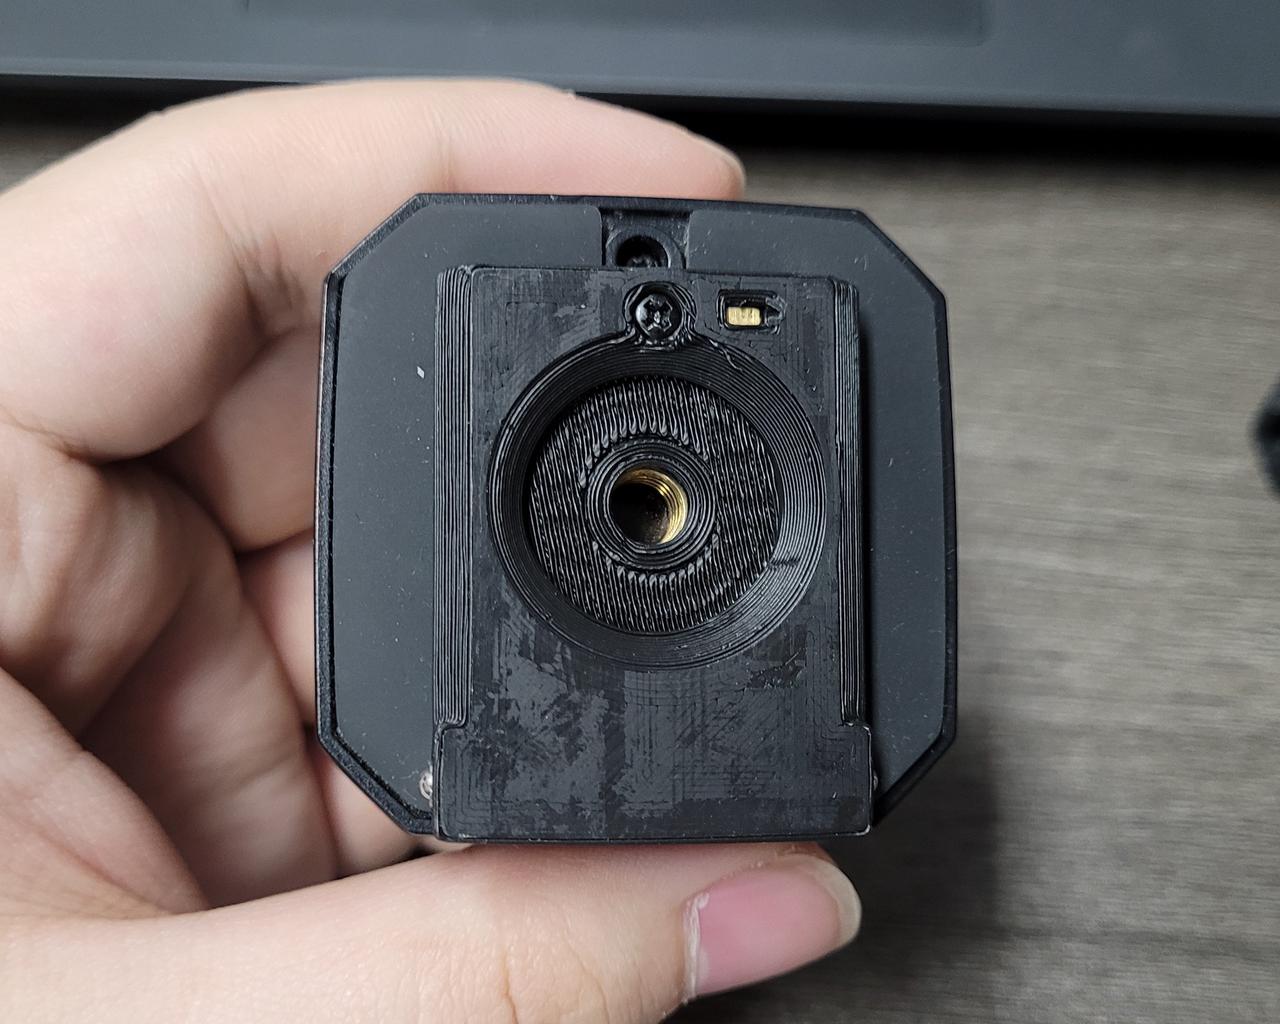 4. Position quick-release module above Tracker base with proper alignment 4. Position quick-release module above Tracker base with proper alignment |
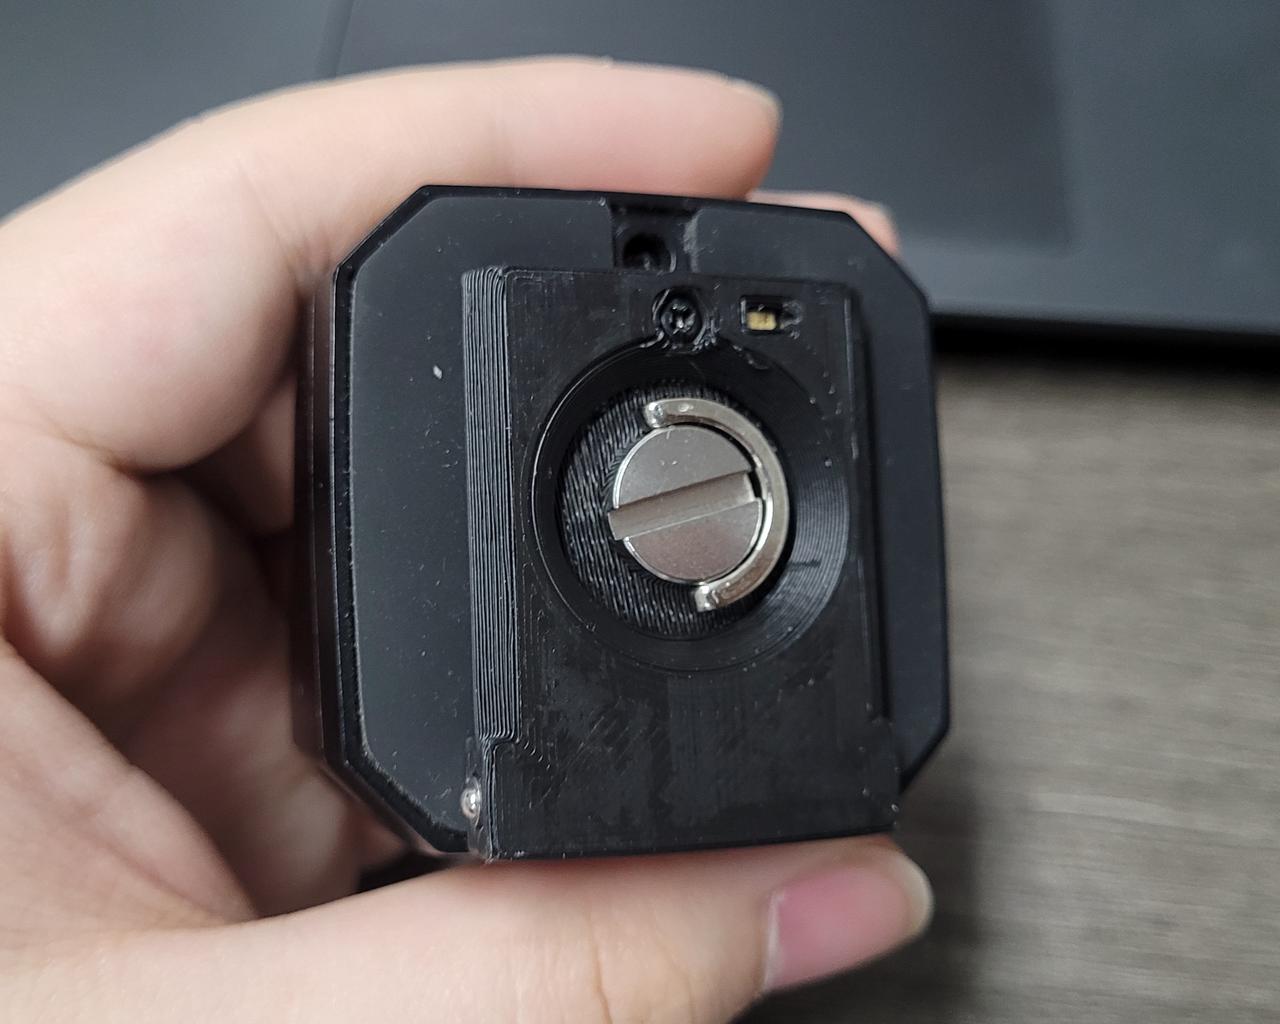 5. Tighten screw while pressing auxiliary handle until flush 5. Tighten screw while pressing auxiliary handle until flush | 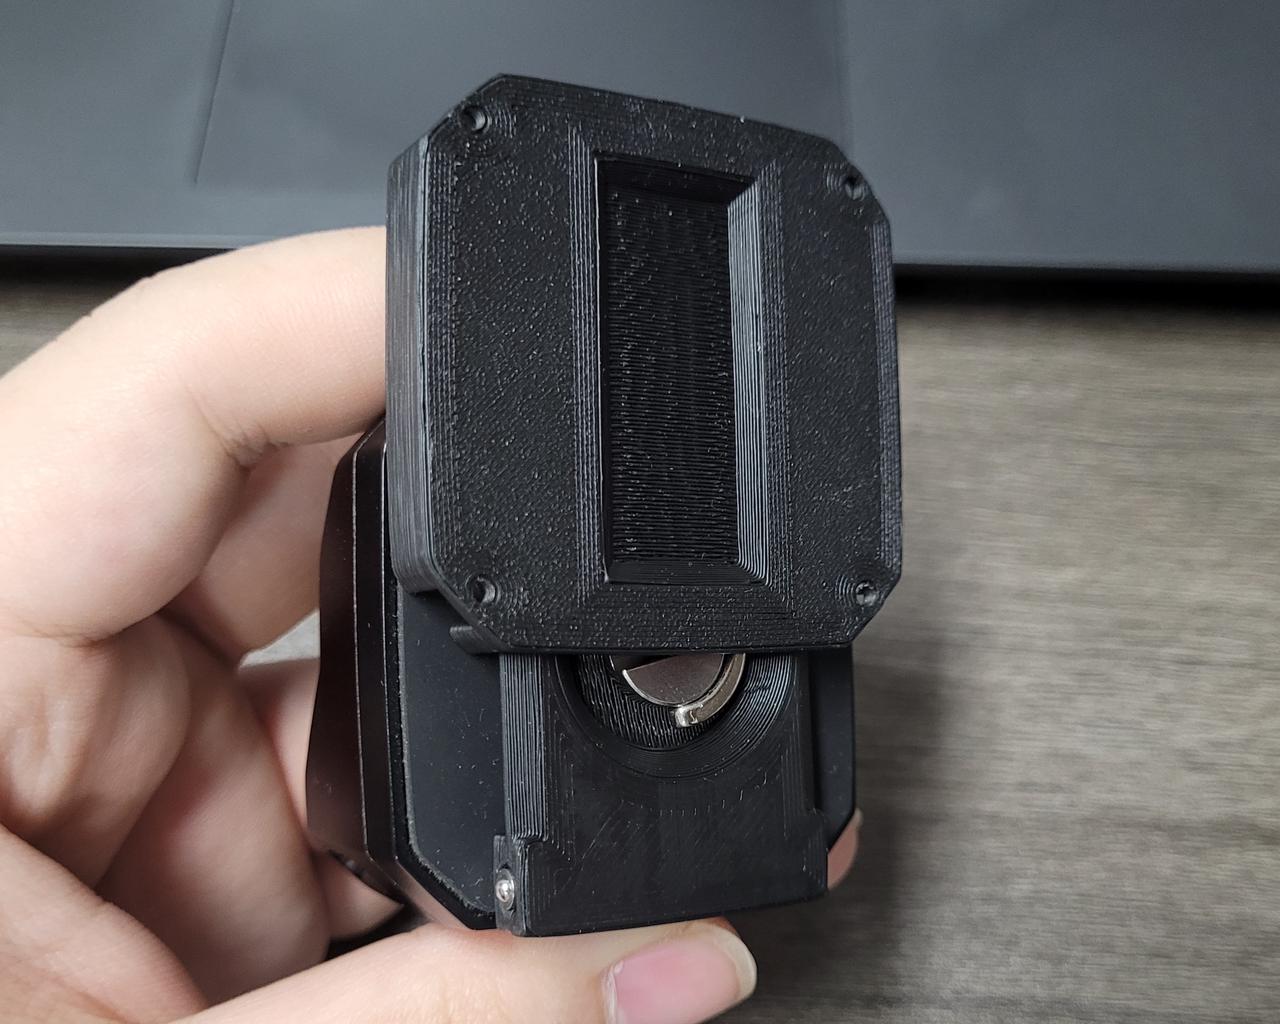 6. Reinsert module into base until audible click is heard 6. Reinsert module into base until audible click is heard |
 7. Installation complete 7. Installation complete |
Tip
HIG Glove doesn't force the Controllers or Trackers mounting orientation, the official recommended mounting method is used in conjunction with the HIG GloveNG built-in Tuning presets.If there are special needs, you can also adjust the mounting direction of the position source to suit the situation and use the Tuning function to calibrate the HIG Glove's positioning coordinates.